Author: Lawrie George

  • Lego GBC Rover

    Lego GBC Rover

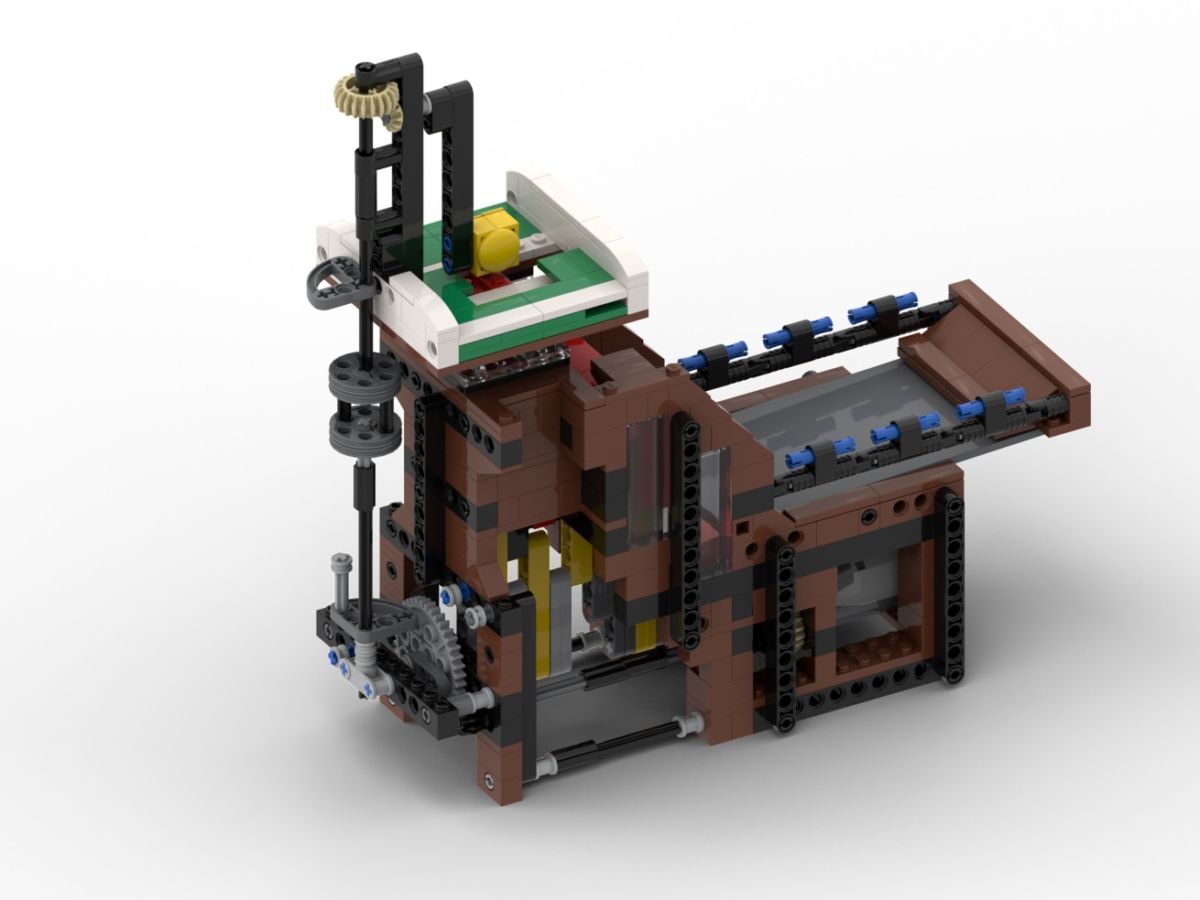
    Lego GBC Rover is a simple bucket lift module designed by Lawrie George.

    It uses an excavator bucket and a simple crank setup to lift balls from the input tray up to next GBC module.

    The inspiration came from challange to build a simple module using the bucket element, from here it was a process of experimenting with different lever combinations to find one that tilted the bucket from a down to up position.

    Even after I was happy with the basic mechanism it took quite a bit of experimenting to get a the loading gate and input ramp geometry just right so that balls would be picked up and transfered to the next module.

    After the module had passed my workbench testing and completed a few shows I was ready to create instructions and a video of its operation (see below).

    Night Lighting

    I haven’t set this module up for nighttime running but it would certainly be possible using my custom Lego UV/Led lights or something similar.

    Videos

    Videos of these modules in operation

    Modules

    Builds and revisions to this module

    Original

    Pieces Cost Difficulty
    <250 $$ Easy

    The instructions can be found here: Lego GBC Rover Instructions.

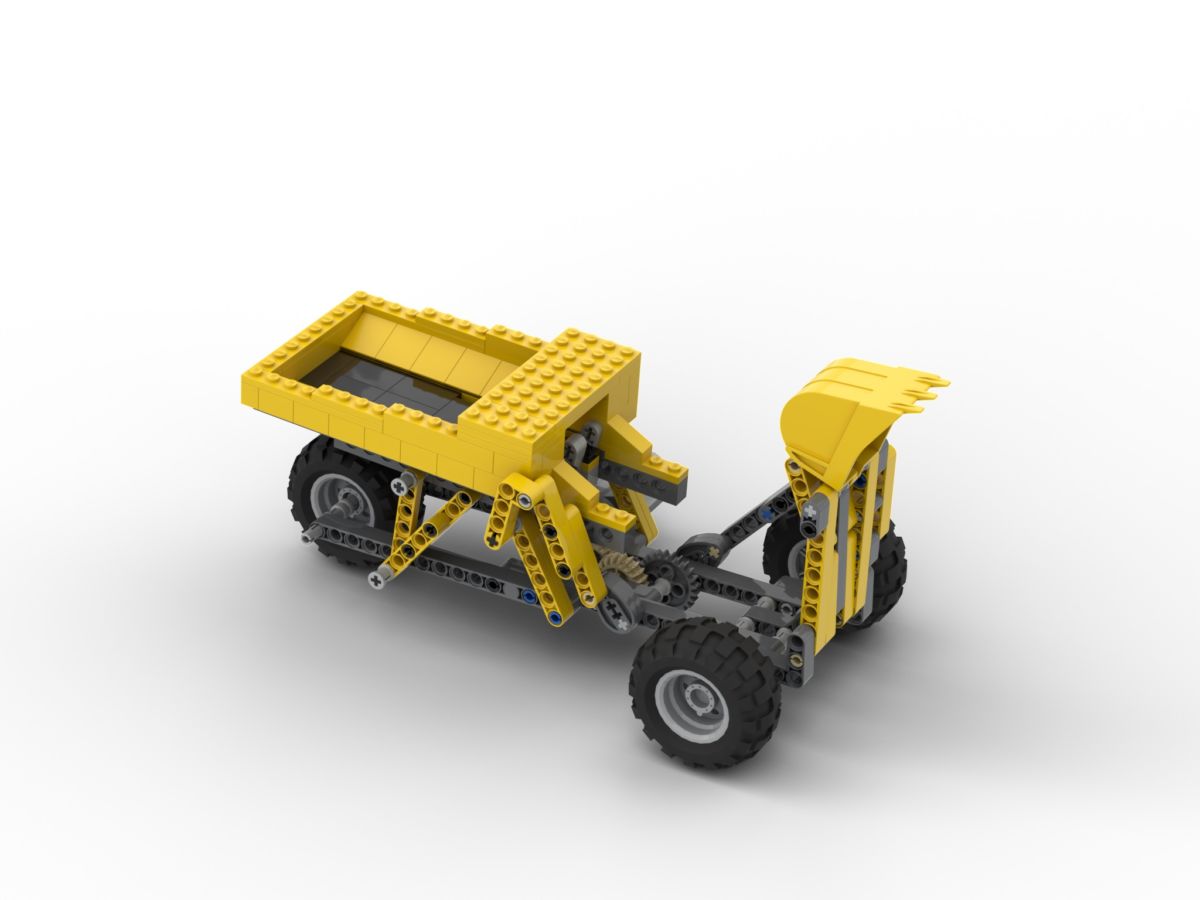
    • Initial design with minifigure decoration.

    V1.2

    Pieces Cost Difficulty
    201 $$ Easy

    The instructions can be found here: Lego GBC Rover Instructions.

    • Updated element usage to increase color options.
    • Changed back wheel mounting to reduce strain on chassis.

  • Making Lego UV Led lights

    Making Lego UV Led lights

    Disclosure: This post contains affiliate links that earn me a small commission, at no additional cost to you. I only link products I personally use and think my readers will find useful. Affiliate links will be clearly marked with the text (Paid Link Disclaimer) next to them.

    Running GBC modules for World of Lights and other night themed Lego shows can be a lot of fun.

    This posts covers how I make my main two adapters a Lego PF Light and UV LED and 12V UV LED Strip, you can read about other UV lighting methods here Lego GBC Night Lighting.

    Lego PF Light and  UV LED

    Parts

    Qty Item Link
    1 5mm UV LED https://www.amazon.com/s?k=5mm+uv+led (this is just a search for UV LEDs as the ones I got are no longer available)
    1 Lego LED Light Bricklink
    10mm 6mm Heatshrink https://amzn.to/2XKjA9y (Paid Link Disclaimer)
    8mm 10mm Heatshrink https://amzn.to/2XKjA9y (Paid Link Disclaimer)

    Tools

    1. Soldering Iron and Solder
    2. Hotmelt Glue Gun and Hotmelt Glue
    3. Sidecutters
    4. Scissers
    5. Gas Lighter

    Steps

    (see video for details)

    1. Apply tape to back of Lego LED
    2. Slide over 10mm heatshrink and shrink onto Lego LED
    3. Cut 2nd Lego LED off
    4. Solder UV LED on
    5. Apply Glue to join
    6. Slide over 6mm heatshrink and shrink onto UV LED

    12V UV LED Strip

    This LED strip is used in Lego GBC Brickworld Ball Pump UV LED Adapter Instructions.

    Parts

    Qty Item Link
    1 UV LED Strip https://amzn.to/2XrH9Ql (Paid Link Disclaimer)
    1 5.5×2.1 DC Pigtail https://amzn.to/2XTuN7SPaid Link Disclaimer)
     20mm 6mm Heatshrink https://amzn.to/2XKjA9y (Paid Link Disclaimer)

    Tools

    1. Soldering Iron and Solder
    2. Hotmelt Glue Gun and Hotmelt Glue
    3. Sidecutters
    4. Gas Lighter

    Steps

    (see video for details)

    1. Cut LED strip to desired length (along cut lines)
    2. Clean and tin connectors
    3. Solder DC Pigtail to LED strip
    4. Apply Glue to join
    5. Slide over 6mm heatshrink and shrink.

    Video of assembling Custom LEDS.

    Lego PF Light and UV LED – 1:53
    12V UV LED Strip – 8:42

  • Brickworld Chicago 2019

    Brickworld Chicago 2019

    Attending Brickworld Chicago 2019 this year I joined the record-breaking GBC loop that was there.

    The layout contained over 390 modules with a linear length of over 320ft / 120 meters and it took a ball over an hour to travel around the whole loop.

    I had 2 tables of continuous modules which started with a group of modules with Instructions.
    This led into my Lego GBC Mini Golf then into my Tower Crane (bridge) module.
    After spanning the gap I had GBC Chain Reactions, Lego GBC Lapras, and Rover before my new Stargate module.

    I also had a range of other modules scattered about the loop for a total of 48 modules (roughly 12% of modules on the table).

    This year was particularly busy and some of my older modules like Lego GBC Scrolling Display, Lego GBC EV3 Truck, and Lego GBC Super Tower Battle stayed in there boxes under the table.

    This year we also ran the entire perimeter loop for the first hour of World-of-Lights.

    As GBC Night Coordinator this involved several hours set up to ensure we had UV charging stations spaced around the layout and that all modules were pre-loaded with the UV balls for the run.

    We also moved Toms Ferris wheel from the inner loop to the outside to include it in the night show.

    Video of my section

    Video of the entire loop by Beyond the Brick

  • Lego GBC Lapras

    Lego GBC Lapras

    Lego GBC Lapras was a challenge issued by one of my children to build a GBC module that looked like the Pokemon Lapras.

    To do this I took one of our existing modules a Brickworld Ball Pump (as it had a similar shape to a Lapras) and began the process of theming it to look like a Lapras wearing a saddle.

    Some key challenges while building were to ensure that structural bracing (lift arms on the side) were not removed and that the module as a whole still met GBC standard. This meant the input area still needed to be 10x10x10 bricks (length x width x height) and that the output was no more than 13 bricks high by using an output ramp.

    Video of this module in operation.

  • Lego GBC Mini Golf Putter V2.2 Update

    Lego GBC Mini Golf Putter V2.2 Update

    Lego GBC Mini Golf Putter V2.2 Update is a list of changes to the Lego GBC Golf Putter V2 that is used in the Lego GBC Mini Golf course.

    The update contains the following mix of cosmetic and performance-based changes.

    • The main pistons are now 1 plate higher to ensure balls are passed to the final piston.
    • The input ramp angle is now slightly steeper.
    • Added snot bricks and studs to stop the input ramp flipping up.
    • The drive ratio has been increased from 20/12 to 20/16 to speed the module to just over 1 ball per second on full speed.
    • The crankshaft now uses 1×3 thin liftarms instead of connectors to reduce friction.
    • Conrods are now in yellow for better visibility.
    • Stop axles are now used for transfer drive to make extension easier.
    • The body has been reinforced with liftarms for better transport durability.
    • Putter drive axle now has a slip join to better handle accidental direction reversal.
    • The putter will no longer hit the backing green.
    • V2.2.1, add a inset into step 78 to clarify timing.

    Videos

    Video of the updates.

    Video of the extensions.